Pages

Showing posts with label Scrappindollars. Show all posts

♥ Luckday


This tutorial was written and created by me on 18th March 2014
and for those with a working knowledge of PSP


Supplies needed
Created by using PSP X5 - any resemblance to another is coincidental.

Scrapkit Lucky Day created by Kim's Korner
scrappindollars

Tube is by Keith Garvey

Mask of Choice
Font Great Vibes

Template_76  by Drama Bomb Designs.
Duplicate your template close original.
Delete your © info and background and layers 6,7,9.
Select layer1 Selections Float Defloat
Copy paste kk_LuckyDay_paper12 into selection, deselect.
Select layer3 Selections Float Defloat
Copy paste kk_LuckyDay_paper02 into selection, deselect.
Select layer4 Selections Float Defloat
Copy paste kk_LuckyDay_paper18 into selection, deselect.
Select layer5 Selections Float Defloat
Copy paste paper10 into selection, deselect.
Select layer8 Selections Float Defloat
Copy paste kk_LuckyDay_paper11 into selection, deselect.
Select layer11 Selections Float Defloat
Copy paste kk_LuckyDay_paper06 into selection, deselect.
Select layer12 Selections Float Defloat
Copy paste kk_LuckyDay_paper16 into selection, deselect.
Open your tube closeup copy paste above layer8 resize to fit change Blend Mode to Luminace (L).
Copy paste your main tube position to your liking select part of main tube copy paste on left
above layer 3 and change Blend mode to Luminace (L).
 Give your main tube a drop shadow.

I used these elements resize as needed.
kk_LuckyDay_leave03 
kk_LuckyDay_leaves02
kk_LuckyDay_gold duplicate
kk_LuckyDay_whiskey01
kk_LuckyDay_tag
kk_LuckyDay_wordart03
kk_LuckyDay_beer02
kk_LuckyDay_bow05
kk_LuckyDay_doodle01
kk_LuckyDay_button04
See tag for placement give all a drop shadow of choice.
Select background layer select all copy paste kk_LuckyDay_paper17 apply your mask.
Add your Artist © license and your name merge and save.
Thanks for stopping by, I hope you enjoyed it.


Summers Dying Wish


Written on 17th September 2013 using PSP X5 - any resemblance to another is coincidental.
This was written for those with a working knowledge of PSP


Supplies

Summers Dying Wish created by Jackie's Jewels
You can purchase this beautiful kit from Scrappingdollars Here..

Artwork of choice - I am using the work of Arthur Crow.
You can purchase this tube Here 

Please do not use  his tube/s without a valid license.

Mask of Choice.

Drop Shadow 2/2/50/5.

Font AnnabelleJF 'LessIt'

C/P = Copy Paste
New transparent raster layer 750 x 750.

You can resize or crop later.

Select your Elispe Tool draw out a oval med-large, duplicate then enlarge slighty.
On duplicated layer select all expand by 3, c/p into selection pp1 deselect 
then apply these settings: Adjust Add Noise.


Select oval-1 layer select all expand by 3 c/p into selection pp9 .
Select your closeup tube new layer paste into selection. Resize 75 percent twice. 
Move to left of frame.Change Blend Mode to Luminacy(L) and lower Opacity to 51.
Add a new layer below oval-2 using Preset Rectangle then duplicate layer
 place one lower right of layer the other top left of layer.
On bottom rectangle select all expand by 3 c/p pp4 into selection, deselect.
On top rectangle select all expand by 3 c/p pp7 into selection, deselect.
Select Cloud cp/ move to  top left of oval frame.
Select Brickwall c/p move  to the left bottom of oval frame.
Select Bush c/p move to left of layer.
Select Chest 1 move to right of layer resize 75%.
Select Book2 c/p move to right of layer resize 75% twice.
Select MusicNotes c/p move to left of layer resize 85%.
Select Pumkins c/p move down in fron of chest resize 55%.
Select Book c/p move down in front of other books resize 45%.
Select your main tube c/p arrange on chest, resize if needed.
Select Watch c/p move next to tube hand.
Select Bird c/p move to top left of musicnotes, Image-Flip Horizontal, resize 70%.
Duplicate the bird move to right  top of lower rectangle resize 65%.
On background layer select all c/p pp1 into selection deselect apply your mask.

Add your Artist © license and your name merge and save.

Thanks for stopping by, I hope you enjoyed it.


Beach ♥ Babe


Written on 6th May  2013 using PSP X5 - any resemblance to another is coincidental.
This was written for those with a working knowkedge of PSP


Supplies


Summertime Blues created by Bubbles Dream
You can purchase this beautiful kit from Scrappindollars.

Artwork of choice - I am using the work of  Dave Nestler.

Please do not use tube/s without a valid license.

Mask of choice.

Let's Go!!!!

New transparent raster layer 800 x 800.

Open paper01 copy paste as new layer apply your mask merge group.
Open Element12 paste as new layer using your selection tool draw out rectangel to fit frame.
Open paper04 paste as new layer resize 80 percent. Selections Invert tap delete, 
drag below frame layer, deselect.
Open Element13 paste as new layer below  frame paper layer.Duplicate Image Mirror Flip. 
Open Element01 paste as new layer position on right of layer add drop shadow.
Open Element35 paste as new layer below frame resize 85 percent twice add drop shadow.
Open Element31 paste as new layer resize 25 percent duplicate image mirror arrange 
on left of frame. Add a drop shadow.
Open Element10 paste as new layer move to left at top of frame resize 65 percent.
Use your Pick tool to angle it.With you Eraser remove part of the string 
so it looks attached to frame.Give a drop shadow.
Open Element16 paste as new layer move to top of frame resize to fit add drop shadow.
Open your tube paste as new layer move to right of frame.
Using the selection tool select top of tube right click on layer Promote Selection to layer.
Resize this by 120 percent Image mirror move to left of frame.Lower Opacity to 38.
Move layer below frame.
Open Element23 paste as new layer resize 40 percent duplicate Image mirror
.Give both a drop shadow.
Open Element21 paste as new layer resize 65 percent move to bottom left of layer
 add drop shadow.
Open Element22 paste as new layer resize 70 percent duplicate arrange at bottom of frame.
Add drop shadow.
Open Element08 paste as new layer resize 80 percent arrange on layer.Add drop shadow.
Open Element32 paste as new layer resize 60 percent arrange on layer, add drop shadow.
Open Element18 paste as new layer resize 42 percent arrange in front of bag add drop shadow.
Open Element03 paste as new layer move to bottom of layer. 

Add your Artist © license and your name merge and save.

Thanks for stopping by, I hope you enjoyed it.


Schools In ♥


Written on  6th May  2013  using PSP X5 - any resemblance to another is coincidental.
This was written for those with a working knowledge of PSP


Supplies

1st Grade Bound created by SleeknSassy Designz
You can purchase this beautiful kit from Scrappindollars.

Artwork/Tube  of Choice. 

Mask of Choice.

Mask of Choice.

          Let's Go!!!


New transparent raster layer 800 x 800.

You can resize or crop later.

Open 1stGB_Paper11 paste as new layer apply your mask merge group.
Open 1stGB_Element11 copy paste as new layer arrange in center of layer
 then add a drop shadow.
Open 1stGB_Element31 copy paste as new layer resize 35 percent add drop shadow 
drag up to top left of blackboard.
Open 1stGB_Element21 copy paste as new layer resize 38 percent arrange 
on left of board add a drop shadow.
Open 1stGB_Element25 copy paste as new layer resize 80 percent move to left of layer
 add drop shadow.
Open 1stGB_Element5 copy paste as new layer resize 45 percent place on desk add drop shadow.
Open 1stGB_Element38 copy paste as new layer resize 45 percent Image Mirror
 move to left of desk.Add drop shadow.
Open MBW-BacktoSchool paste as new layer move to right of layer add drop shadow.


Add your Artist © license and your name merge and save.

Thanks for stopping by, I hope you enjoyed it.


I'm Too Sexy for My Tat's ♥


Written on    using PSP X3 - any resemblance to another is coincidental.
This was written for those with a working knowledge of PSP.

Supplies

  Sexy Tatoos created by Delicate Pearl
You can purchase this beautiful kit from Scrappindollars.

Artwork of choice - I am using the work of Arthur Crowe 
Please do not use tube/s without a valid license.

Mask of Choice.


Let's Go!!!

New transparent raster layer 800 x 800.

Select your Preset shape- I used the No symbol sign draw out 
a large shape-Align Center in center.
Click to enlarge.

Click in the outside shape Modify expand by 4. Open DPI_SexyTatoo_paper07
 paste into selection then apply a Inner Bevel of choice.Add a drop shadow. 
Click inside both sides of shape Modify-expand by 4.
Open DPI_SexyTatoo_paper05 paste into selection. Adjust-Blur.Drag under layer 1.
Open your closeup tube copy paste align selections-Invert tap delete.Lower Opacity to 65.
Merge all layers visible.Add a new layer Arrange send to bottom select all.
Open DPI_SexyTatoo_paper02 paste into selection apply your mask.
Open DPI_SexyTatoo_element04 paste below merged layer. Resize to fit shape give a drop shadow.
Draw out a circle just larger than the circle element add the your own wordart or the one I used 
 - I'm too sexy for my Tat's .
Click on the box+ then closeout the circle layer convert to raster layer.Give your wordart a drop shadow.
Open DPI_SexyTatoo_element15 paste resize 43 percent move to left of layer add drop shadow.
Open DPI_SexyTatoo_element17 paste as new layer above heart resize 32 percent.
Image Mirror drag back to left side of layer place on over heart/ribbon, add drop shadow.
Open DPI_SexyTatoo_element45 paste as new layer above merged shape layer.
Using FreeRotate 32-Right. Duplicate Image Flip.
Add your main tube resize if needed give a drop shadow.
Open DPI_SexyTatoo_element22 paste as new layer drag to left of layer
 resize 36 percent add drop shadow.
Open DPI_SexyTatoo_element08 paste as new layer move to left 
 resize 32 percent add drop shadow.


Add your Artist © license and your name merge .
You can resize or crop now and save.

Thanks for stopping by, I hope you enjoyed it.


Punk Rocker ♥


PTU Punk Party created by Kim's Korner
You can purchase this beautiful  kit
at Scrappindollars Here.

Artwork of © JlolllaDka
Currently available at Pics For Design Here.
You will need a license to use this artwork.

Font of choice

Mask of Choice .


This was written with the use of PSP X5.
You may recreate it any version of PSP.

New transparent raster layer 800 x 800.

You can resize or crop later.

Open kk_PunkParty_paper06 copy paste on background layer apply mask merge group.
Open KK_PunkParty_spikedheart03 copy paste as new layer resize 85 percent add drop shadow.
Open KK_PunkParty_drums02 copy paste as new layer resize 80 percent add drop shadow.
Open KK_PunkParty_musical copy paste as new layer resize 90 percent add drop shadow.
Open KK_PunkParty_ribbon12 copy paste as new layer resize 75 percent Flip Vertical,
 duplicate Flip horizontal give both drop shadow.
Open KK_PunkParty_discoball copy paste between ribbon layers resize 55 percent
add light drop shadow.
Open KK_PunkParty_bag04 copy paste as new layer resize 20 percent add drop shadow.
Open KK_PunkParty_bottle03 copy paste as new layer resize 42 percent add drop shadow.
Open KK_PunkParty_ stuffedanimalcutie01 copy paste as new layer
 resize 22 perecnt add drop shadow.
Open your tube copy paste as new layer resize if needed add drop shadow.
Open KK_PunkParty_microphone copy paste as new layer resize 85 percent
 Flip Horizontal add drop shadow.


Add your Artist © and your name then crop or resize.

Thank you for trying my tutorial, I hope you enjoyed it.


I'd love to see your results please email me Here
so that I can show them on my Blog.


Cream of the Irish ♣


Supplies Needed

PTU Irish Cream created by BLT DeZignz
You can purchase this beautiful kit at.Scrappindollars

Artwork of © Jose Cano - Rachel
Currently available at SATC.
You will need a license to use this artwork.

Font of choice


Template  by Sue Here


This was written with the use of PSP X5.
You may recreate it any version of PSP.

Duplicate your template then close original.Delete the © layer.

You can resize or crop later.

Click on Mask layer Select All Float Deflaot.Open BLT_IrCrm_Smudge copy paste into selection.
Deselect.
On rectangle layer select all Float Deflaot copy paste into selection BLT_IrCrm_PP12 repeat this for the other rectangle layer.
Click on rectangle frame Select All Float Deflaot flood fill with Earth 2 Gradient(Green).
Add Noise with these setings, then add drop shadow.Repeat for other frame layers.


Click on circles 2 Select all Float Deflaot open BLT_IrCrm_PP3.Open your material palette -Pattern and find the paper Angle 45 Scale 100. Repeat for circle 1 but use your Gadient color this time. Give both a drop shadow.
Open BLT_IrCrm_PP4 resize 50 percent twice copy.
Click on circle layer select all Float Defloat paste PP4 into selection, deselect.
Repeat for cirlce frame the same as we did the rectangle frames and add a Inner bevel to the circle frame with these settings.

On Dot circle layer give a drop shadow to layer.
Open BLT_IrCrm_Envelope copy paste above dots layer resize to fit then add a drop shadow.
Open BLT_IrCrm_Ribon1 coy paste above rectangle frame layer resize to fit then
Image Mirror give a drop shadow.
Open BLT_IrCrm_String copy paste above ribbon layer resize to fit. With your selection tool or eraser if you feel more comfortable using erase part of the ribbon on the top left.See below.
Add your tube now resize if needed I placed mine on the left of layer add drop shadow.
Using your selection tool select part of the tube promote selection to layer.
Duplicate it twice.Arrange on layer to your liking above rectangle layer.
Blend Mode to Luminace(L) to all duplicated layers.On the left tube make the  Opacity to 82 tube on right Opacity 66 and center I resized this again give Opacity 78.

Open BLT_IrCrm_Cluster copy paste above rectangle frame layer resize add a drop shadow.
Open BLT_IrCrm_Bow2 copy paste above cluster layer resize to fitImage Mirror-Flip give a drop shadow.
Open BLT_IrCrm_Flower1 copy paste above verical rectangle layer resize to fit the Duplicate Image Mirror arrange  on layer.

Add your Artist © and your name then crop or resize.

Thank you for trying my tutorial, I hope you enjoyed it.


I'd love to see your results please email me Here 
so that I can show them on my Blog.

Tutorial by © Maree *(DesignsbyFalcon)  March 2013.


Shamrock Jig ♣


PTU Irish Maiden created by SleeknSassy Designz.
You can purchase this beautiful kit at Scrappindollars .

Artwork of © Keith Garvey
Currently available at Garv-Girls.
You will need a license to use this artwork.

Font of choice

Mask of choice.

This was written with the use of PSP X5.
You may recreate it any version of PSP.

New transparent raster layer 800 x 800.

You can resize or crop later.

Open IM_Element15 c/p as new layer move toward top of layer. Adjust-Add Noise Uniform 50%.
Click in frame with Magic wand Selections-Expand by 5 new layer.
Open IM_Paper11 paste copy paste into selection, deselect then drag below frame layer.
Open IM_Element33 c/p below frame layer add a drop shadow.
Open IM_Element39 c/p move to right of layer resize 55 percent, add drop shadow.
Open IM_Element8 c/p move down from frame reisze 45 percent add drop shadow.
Open IM_Element16 c/p move place on hat resize 65 percent add drop shadow.
Open IM_Element11 c/p resize 35 percent move to left bottom of hat add drop shadow.
Open IM_Element1 c/p  arrange on top of ribbon resize 45 percent add drop shadow.
Open IM_paper7 c/p on background layer add your mask of choice.Merge group.

Open MBW-Irish Maiden02 c/p move to left of layer add drop shadow.
Open MBW-Irish Maiden01 c/p move to right of layer add drop shadow.

Add your Artist © and your name then crop or resize.

Thank you for trying my tutorial, I hope you enjoyed it.


I'd love to see your results please email me Here
so that I can show them on my Blog.

Tutorial by © Maree *(DesignsbyFalcon) 2013.


Rock To The Beat


PTU Music Connection created by Lov-Crea
You can purchase this beautiful kit at Scrappindollars.

Artwork of ©Disco-Science - Felicia
Currently available at PFD.
You will need a license to use this artwork.

Font of choice

Mask_59 by Insatiable Dreams Here
or your own choice.

This was written with the use of PSP X3.
You may recreate it any version of PSP.

New transparent raster layer 700 x 700.

You can resize or crop later.

Select all on your background layer.
Select LC_music_connection Papiers 9 copy paste into selection deselect then apply mask.
Select LC_music_connection 33 copy paste resize 30 percent.
Select LC_music_connection 45 copy paste Image Flip then Mirror
Select LC_music_connection 33 copy paste resize to fit frame above.
Using your Selection tool -Ellipse draw out a circle to fit inner circle of speaker.Add a new raster layer.
Select your closeup tube copy paste into selection deselect set Blend mode -Luminacey (L).
Select LC_music_connection 48 copy paste resize arrange over closeup tube.
Copy paste your main tube  move to right of layer. Resize if needed then add drop shadow.
Select LC_music_connection 15 copy paste resize 65 percent move to left of layer,see tag.
 Add a drop shadow.
Select LC_music_connection 21 copy paste arrange over layer resize if needed.
Select LC_music_connection 42 copy paste  resize 45 percent move next to tube add a drop shadow.
Select LC_music_connection 34 copy paste resize 62 percent duplicate
arrange on layer add a drop shadow.
Select LC_music_connection 31 copy Image FreeRotate 90 Left resize to fit then add a drop shadow.
Select LC_music_connection 23 copy paste drag to bottom of layer
Image Mirror resize 80 percent add drop shadow.
Select frame 01 copy paste as new layer resize 30 percent drag to top of layer arrange to your liking
.Add a drop shadow.
Select LC_music_connection 51 copy paste as new layer resize 40 percent move to left of layer.
Adjust-Noise-Uniform 50% add a drop shadow.

Add your Artist © and your name then crop or resize.

Thank you for trying my tutorial, I hope you enjoyed it.


I'd love to see your results please email me Here
so that I can show them on my Blog.

Tutorial by © Maree *(DesignsbyFalcon)  2013.


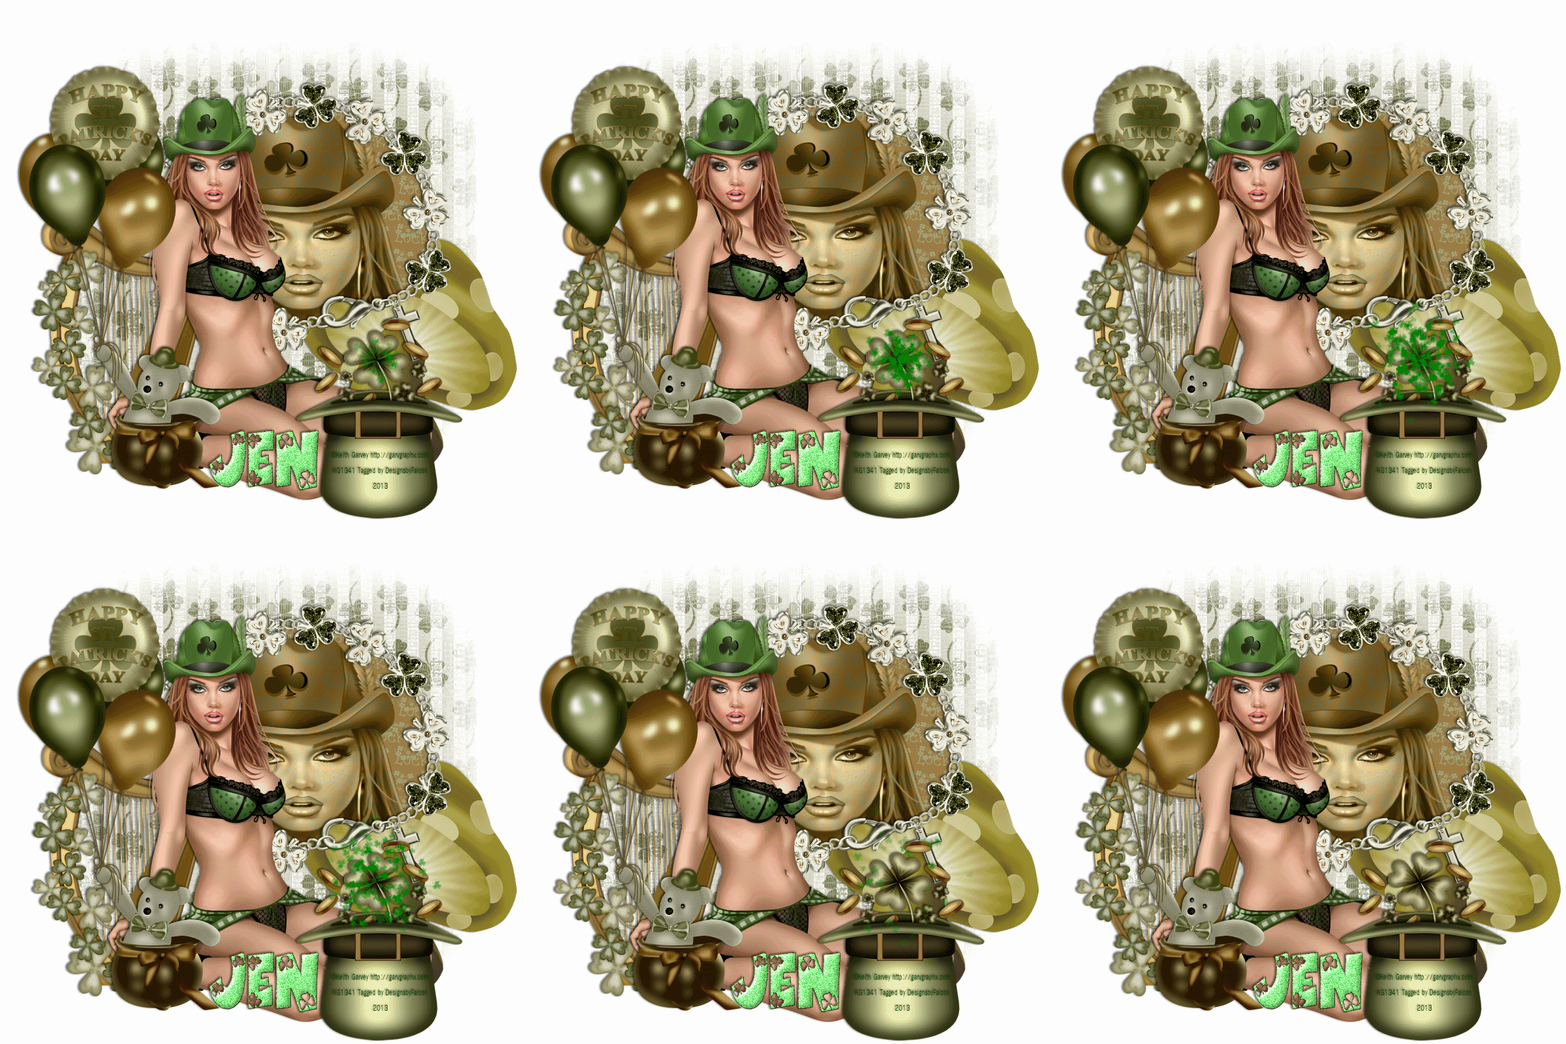
Irish Luck ♣


PTU Irsih Maiden created by SleeknSassy Designz
You can purchase this beautiful kit at Scrappindollars.

Artwork of © Keith Garvey
Currently available at Garv-Girls.
You will need a license to use this artwork.

Font of choice

Mask of Choice .

Animation Here
Simone has made some wonderful animations,
please leave some love.

Animation shop

This was written with the use of PSP X5.
You may recreate it any version of PSP.

New transparent raster layer 800 x 800.

You can resize or crop later.

Open IM_Elemant20 c/p as new layer move to right, add drop shadow.
Cllick inside with Magic wand Selections-Expand by 4.Add new layer.
Open IM_paper copy paste into selection, drag below frame layer.
Add a new layer above paper layer.
Select your closeup tube copy paste into selection,c.hange blend mode to Lumancy(L).Deselect.
Open IM_Element50 c/p below paper layer, resize 75 percent, drag to right of layer.
Open IM_Element18 c/p above frame layer, move to left add drop shadow.
Select your main tube c/p adjust size if needed.Add drop shadow.
Open IM_Element22 c/p move to left of tube add drop shadow.
OPen IM_Element4 c/p move to right of tube resize 85 percent Adjust-sharpen. Add drop shadow.

Add your Artist © and your name then crop or resize.

Animation

1. Open AS click back to Psp, please make sure your Progate paste button is activated.
2. Edit Copy Special-copy merged.
3. Click in AS paste as new animation.Using Ctrl+L till you have 12 frames.Select All (Ctrl+A)
4. On your animation Select all Edit Copy.
5. I pasted mine on the large clover in hat you may place it where you want.
6. Check your animation then save as a Gif.

Thank you for trying my tutorial, I hope you enjoyed it.

I'd love to see your results please email me Here
so that I can show them on my Blog.

Tutorial by © Maree *(DesignsbyFalcon) 2013.