Pages

Showing posts with label PTU. Show all posts

♥ Mystical Lady


This tutorial was written and created by me on 2 April 2014
and for those with a working knowledge of PSP


Supplies needed 

Created by using PSP X6 - any resemblance to another is coincidental.

Tube_Queen by Alena Lazareva 

Scrapkit Mystic created by J T Designs
You can find this beautiful kit Here. scraps from the heart


Font -  Great Vibes

Lets Go!

New transparent raster layer 700 x 700   .

You can resize or crop later.

Select JTD_Mystic-55 copy paste as new layer resize 63 percent.
Dupiciate Image Flip Horizontal Layers Merge down.
Click inside frame with Magic wand Selections Expand by 4.
Select JTD_Mystic-P5 copy paste as new layer.Position paper to your liking
then Selections Invert tap delete, deselect.
Select JTD_Mystic-P1 copy paste on background layer apply your mask merge group.
Select JTD_Mystic-48 copy paste as new layer above background layer.
Resize 75 percent  move to left of layer then duplicate  Flip Horizontal.
Open your tube copy paste as new layer above frame paper layer.
Resize to fit then duplicate drag below original layer.
On duplicated layer apply these settings:

Select JTD_Mystic-3 copy paste as new layer arrange bottom of frame.
Select JTD_Mystic-31 copy paste as new layer move to bottom left of frame.
Resize 75 percent.
Select JTD_Mystic-9 copy paste as new layer, resize 65 percent. 
Then using your Selection tool select the smaller stand


Right click - Promote selection to layer.
Delete the original stand.Drag above silver mask (El 31) layer. 
Select JTD_Mystic-23 copy paste as new layer resize 55 percent.
Place on silver mask.Duplicate then resize 75 percent place on stand.
Select JTD_Mystic-16 copy paste as new layer resize 35 percent move to top left of frame.
Select JTD_Mystic-17 copy paste as new layer resize 38 percent place top right of frame.
Select JTD_Mystic-21 copy paste as new layer resize 35 percent move to bottom right.
Image Flip Horizontal. 
Select JTD_Mystic-7 copy paste as new layer resize 32 percent move
 to bottom left in front of stand.
Give all elements a drop shadow 4/4/55/5.


Add your Artist © license and your name merge and save as png.

Thanks for stopping by, I hope you enjoyed it.


♥ Bite Me

This tutorial was written and created by me on 20th March 2014
and for those with a working knowledge of PSP


Supplies needed
Created by using PSP X6 - any resemblance to another is coincidental.

Scrapkit Back Off Bitch created by Shells's Scraps
 exquisite scraps
Font Romance Fatal W1G

Template Bite Me by Designz By BabyDragon.

Duplicate your template close original.Delete raster layers 8 & 9 info.
Select raster layer 5 Selections Float Defloat
Change your background material palete to #00000
then flood fill into selection, deselect.
Repeat as above for Copy of Raster layer5.
Select raster layer 4 Selections Float Defloat
Copy paste paper1  into selection, deselect.
Give it a drop shadow of 5/5/50/5.
Select raster layer 3 Selections Float Defloat
Copy paste paper4 into selection, deselect.
I used Lokas 3D Shadow with these settings:
Select raster layer 6 Selections Float Defloat
Copy paste paper3 into selection, deselect.
Select raster layer 7 Selections Float Defloat
Flood fill with #000000 into selection, deselect.
Use Lokas 3D drop shadow.
Select raster layer 2 Selections Float Defloat
Copy paste paper8  into selection, deselect.
Select  raster layer1 Selections Float Defloat
Floodfill with #000000 into selection, deselect.
Use Lokas 3D for drop shadow.
Add your closeup tube move toleft then change BlendMode to Lumiance(L).
Add your main tube resize if needed move to the right of layer give a drop shadow.
Add the following Elements resize if needed.
bag 1
bullet6
Wire1
skull2
punku1
Add new raster layer Arrange-send to bottom floodfill with #000000
then add your mask merge group.
Add your Artist © license and your name merge and save.
Thanks for stopping by, I hope you enjoyed it.


♥ Luckday


This tutorial was written and created by me on 18th March 2014
and for those with a working knowledge of PSP


Supplies needed
Created by using PSP X5 - any resemblance to another is coincidental.

Scrapkit Lucky Day created by Kim's Korner
scrappindollars

Tube is by Keith Garvey

Mask of Choice
Font Great Vibes

Template_76  by Drama Bomb Designs.
Duplicate your template close original.
Delete your © info and background and layers 6,7,9.
Select layer1 Selections Float Defloat
Copy paste kk_LuckyDay_paper12 into selection, deselect.
Select layer3 Selections Float Defloat
Copy paste kk_LuckyDay_paper02 into selection, deselect.
Select layer4 Selections Float Defloat
Copy paste kk_LuckyDay_paper18 into selection, deselect.
Select layer5 Selections Float Defloat
Copy paste paper10 into selection, deselect.
Select layer8 Selections Float Defloat
Copy paste kk_LuckyDay_paper11 into selection, deselect.
Select layer11 Selections Float Defloat
Copy paste kk_LuckyDay_paper06 into selection, deselect.
Select layer12 Selections Float Defloat
Copy paste kk_LuckyDay_paper16 into selection, deselect.
Open your tube closeup copy paste above layer8 resize to fit change Blend Mode to Luminace (L).
Copy paste your main tube position to your liking select part of main tube copy paste on left
above layer 3 and change Blend mode to Luminace (L).
 Give your main tube a drop shadow.

I used these elements resize as needed.
kk_LuckyDay_leave03 
kk_LuckyDay_leaves02
kk_LuckyDay_gold duplicate
kk_LuckyDay_whiskey01
kk_LuckyDay_tag
kk_LuckyDay_wordart03
kk_LuckyDay_beer02
kk_LuckyDay_bow05
kk_LuckyDay_doodle01
kk_LuckyDay_button04
See tag for placement give all a drop shadow of choice.
Select background layer select all copy paste kk_LuckyDay_paper17 apply your mask.
Add your Artist © license and your name merge and save.
Thanks for stopping by, I hope you enjoyed it.


♥ Together for Ever


This tutorial was written and created by me on 29th March 2014
and for those with a working knowledge of PSP


Supplies needed 

Created by using PSP X6 - any resemblance to another is coincidental.


Scrapkit Believe in Love TS created by SleeknSassy Designz

Tube by Keith Garvey 

Mask of Choice

Font of Choice


New transparent raster layer 800 x 800 .

You can resize or crop later.


Open BIL_Element2 copy paste as new layer.click inside frame with Magic wand.
Selections Expand by 6 open BIL_Paper1 Flip Horizontal copy paste as
 new layer arrange over frame then tap Delete, deselect.
Open your closeup tube copy paste below frame layer resize if needed.
Change Blend mode to Luminace(L).
Open BIL_Element24 copy paste as new layer
 below paper layer drag to top of frame.
Open BIL_Element25 copy paste as new layer
below above layer drag to right of layer, see tag.
Open BIL_Element27 copy paste as new  layer
move to top right of frame resize 65 percent.
Open BIL_Element7 copy paste as new layer
 move to bottom left of frame resize 60 percent.
Open BIL_Element36 copy paste as new layer
at bottom of frame resize 45 percent.
Open BIL_Element20 copy paste as new layer resize 65 percent
move to bottom of frame.
Open BIL_Element32 copy paste as new layer resize 40 percent
move to top of frame left side.
Open BIL_Element34 copy paste as new layer resize 65 percent twice
then move to top left corner of frame.
Add your main tube now resize if needed.
Give all a drop shadow 5/5/50/5.
Add a new raster layer select all copy paste BIL_Paper10 into selection.
Deselect then apply your mask, merge group.

Add your Artist © license and your name merge and save as png.

Thanks for stopping by, I hope you enjoyed it.


♥ Beautiful Bold Easter


This tutorial was written and created by me on 28th March 2014
and for those with a working knowledge of PSP


Supplies needed 

Created by using PSP X6 - any resemblance to another is coincidental.

Scrapkit Bold Easter created by Jens Sweet Temptations.

Mask of Choice

Font used Juice ITC

New transparent raster layer 750 x 750.

You can resize or crop later.


Open Frame 5 copy paste as new layer click inside with Magic wand new layer.
Open Paper10 copy click on new layer then paste into selection. 
Open Cake copy paste as new layer above paper layer, resize 55 percent arrange in frame.
Open Bow2 copy paste as new layer arrange on top left of frame. 
Open Flight copy paste as new layer above frame layer move to top left corner.
Open WA1 copy paste as new layer resize 55 percent move to top of frame,see tag.
Open Basket copy paste as new layer resize 45 percent arrange on layer.
Open Flower5 copy paste as new layer move to right of frame.
Open Paint Bunny copy paste as new layer resize 65 percent move to right of layer.
Open Flower 6 copy paste as new layer resize 55 percent move to left of layer.
Open Girl copy paste as new layer move to left of layer.
Open BFly2 copy paste as new layer Image Flip Horizontal resize 35 percent
 move to right of layer. 
Open Satin Ribbon copy paste as new layer then duplicate. arrange on left and right of frame.
then apply these settings.

click on background layer select All copy paste into Selection Paper2 deselect then apply your 

mask.Merge group.

Add your name merge and save.

Thanks for stopping by, I hope you enjoyed it.


♥ Steamy Elegance


This tutorial was written and created by me on 29th March 2014
and for those with a working knowledge of PSP


Supplies needed 

Created by using PSP X6 - any resemblance to another is coincidental.

Tube Woment of Fashion by Trinita. 

Scrapkit Steamy Elegance  created by Kizzed by Kelz


Mask of Choice

Font used Gabriola

New transparent raster layer 700 x 700   .

You can resize or crop later.

Select KBK_SteamyElegance 48 copy paste as a new layer.
Select KBK_SteamyElegance 71 copy paste as a new layer,
resize 90 percent.
Select KBK_SteamyElegance 108 copy paste as a new layer,
resize 75 percent.
Select KBK_SteamyElegance 100 copy paste as a new layer, 
resize 65 percent position on left.
Select KBK_SteamyElegance 123 copy paste as a new layer,
resize 50 percent move to left of layer.
Select KBK_SteamyElegance 84 copy paste as a new layer,
resize 65 percent move to right of layer.
Add your main tube now resize if needed move to the right of layer.
Select KBK_SteamyElegance 9 copy and paste below tube layer, duplicate.
On your duplicated layer Image Flip Horizontal.Using your Pick too angle both
 behind your tube see tag for placement.
Select KBK_SteamyElegance 5 coppy paste as a new layer
move to bottom of tube, see tag.
Select KBK_SteamyElegance 4 coppy paste as a new layer,
move to bottom part of layer, see tag.
Select KBK_SteamyElegance 109 copy paste as a new layer,
resize 40 percent move to bottom right of layer.
Select KBK_SteamyElegance 99 copy paste as a new layer,
resize 45 percent move to left of layer.
Select KBK_SteamyElegance 28 copy paste as a new layer,
resize to 28 percent  move to right of layer,
then use your Pick tool to angle it.
Select KBK_SteamyElegance 26 copy paste as a new layer,
resize 35 percent using your Eraser brush (5), 
erase part of the goggels top center strap.
Give all a drop shadow 4/4/50/4.
Select KBK_SteamyElegance 98 copy paste as a new layer
above mask layer move to top.
New layer open paper KBK_SteamyElegance(5) paste into selection,
deselect then apply your mask.
Feel free to add any other element you wish too.

Add your Artist © license and your name merge and save.

Thanks for stopping by, I hope you enjoyed it.


Forum Set Puppy Love


This tutorial was written and created by me on 11th March 2014
and for those with a working knowledge of PSP


Supplies needed 

Created by using PSP X5 - any resemblance to another is coincidental.

I am using the fantastic artwork of© Angelica S with a valid license
Please go Here to purchase tubes and license.

Scrapkit Me and My Puppy TS created by Shells Scraps.
You can find this beautiful kit Here.exquisite scraps

Font VIN 24 love

New transparent raster layer 600 x 250   .

Select All c/p into selection paper 1 deselect.

Open mug1 c/p as new layer move to right resize 22 percent.
Open kennel2 c/p as new layer resize 45 percent  move to left of layer.
Open frame 1 c/p as new layer resize 30 percent move to left of layer Flip horizontal.
Click inside frame with magic wand Selections-Modify-Expand by 3.
New layer c/p paste tube closeup into select. 
Move below frame layer.Give frame a drop shadow then Merge down.
Open bowl 1 c/p as new layer resize 20 percent move to left.
Open ball 1 c/p as new layer resize 10 percent move to right below mug layer.
Open pawprint2 copy paste resize 12 percent move to top left of kennel.
Add your Artist © license add drop shadow to all then Merge layers visible. 
Copy your tag Image add border any color,


 select magic wand click on the outer border.
Paste your image into selection. Image Flip Vertical then Flip Horizontal 
Effect Filters unlimited Select Andrews filter Collection 62-Swirler 2 use these settings:


Then using 3D Effect-Inner bevel apply these setting:


For your smaller tag select any area from main tag copy paste as new image.
Usually 250 x 250 is a good size I like to use.
You can resize if you feel it is too big.
On your large forum tag add your name and save as png.

Select your small image and repeat from add border.
Add your Artist © license and your name merge and save.
For the name I used my initial only
Thanks for stopping by, I hope you enjoyed it.


SpringTime ♥

This tutorial was written and created by me on 28th February 2014
and for those with a working knowledge of PSP


Supplies needed 

Created by using PSP X5 - any resemblance to another is coincidental.

Tube of choice,I  used the fantastic artwork of ©Zlata_M with a valid license
Please go Here to purchase tubes and license.

Scrapkit Daisies and Daffies created by Scrappin Krazy Designs
You can find this beautiful kit Here.


 I used LaurieMade mask_149 or mask of choice.

Font used VIN 24 Love

Template_37 by SugarBritches 
You will find it under February  2012 Here


Open your template duplicate close original.
Delete  © layer.

Click on layer 3. Select All Float Defloat open p10.
New raster layer then paste into selection.Deselect.
Add Inner bevel edge with these settings:


Then on original layer resize 102 then floodfill with #ffffff.
Adjust Add Noise with these settings;


Click on raster layer 2 Select all Float Defloat new raster layer.
C/p into selection p06  add the same inner bevel as before.
repeat for raster 7 layer. Delete original layer.

Click on raster6 select all Float Defloat new layer
c/p p05 into selection.Apply inner bevel then blur with these settings;


C/p a closeup of your tube an a new layer
then  position to your liking then tap delete, deselect.
Change Blend mode to Lumancy(L) and lower opacity to 55.
Delete original layer.

Click on raster4 select all Float Defloat new layer.
C/p p07 into selection apply inner bevel, deselect.
Delete original layer.


Click on vector 1 layer select all Float Defloat.
new raster layer c/p p11 into selection.Apply inner bevel
deselect then delete original layer.

Click on vector 2layers select all Float Defloat.
New raster layer c/p p05 into selection.
C/p a closeup of tube resize if needed.
Change Mode to Lumancy(L) lower Opacity to 55, deselect.

I used the following elements, see tag for placement.
ele 04 c/p resize  75 percent duplicate 
ele 46 c/p resize 45 percent
ele 08 c/p resize 75 percent duplicate
ele 44 c/p resize 65 percent
ele 28 c/p use your Pick tool to drag out to width needed.
ele 29 c/p use your Pick tool to drag out to width needed.
ele 50 c/p resize 25 percent Flip Horizontal.
ele 12 c/p resize 25 percent.
ele 63 c/p resize 85 percent.
Give all a light drop shadow I used 1/1/50/5.

Add your Artist © license and your name merge and save.

Thanks for stopping by, I hope you enjoyed it.

Irish Legend ♣


This tutorial was written and created by me on 4th March 2014
and for those with a working knowledge of PSP


Supplies needed 

Created by using PSP X5 - any resemblance to another is coincidental.

I am using the fantstic artwork of  © Misticheskaya with a valid license
Please go Here to purchase tubes and license.

Scrapkit  Irish Legends created by Graphics of Fantasy
You can find this beautiful kit Here.


Mask53 by Simone Here  misfitcreations
You will find this under St Past's masks

Font  ObbetteScriptSSK Bold


New transparent raster layer 800 x 800   .

You can resize or crop later.


C/p frame GOF_Irish_Legends(6) resize 75 percent duplicate arrange on layer see tag for pplacement.
Click inside bottom frame Modify Expand by 4 add new raster layer
c/p paper GOF_Irish_legends(6) into selection Adjust Blur-Guassian blur-3, deselelct.
Click on duplicated frame (4) Modify Expand by 4 add new raster.
C/p paper GOF_Irish_legends(5) into selections.
C/p a closeup of your tube move to left of frame lower Opacity to 26 change Mode to Lumancy (L).Deselect.
Open frame GOF_Irish_legends 4 c/p as new layer.
Resize 75 percent.
Open frame GOF_Irish_Legends 3c/p resize 72 percent place over frame 4. 
Click inside frame 4 with Magic wand Modify Expand by 4 new layer.
C/p paper GOF_Irish_Legends(4) into selection drag below frame layer.
C/p a different closeup of your tube and lower Opacity 51.
C/p element GOF_Irish_Legends(36) move to left of frame.
C/p element GOF_Irish_Legends(15) move to right of layer resize 75 percent twice.
C/p your main tube resize if needed move to right of layer.
C/p element GOF_Irish_Legends(24) resize 45 percent Flip arrange on layer.
On background layer select all c/p into selection paper OF_Irish_Legends(3) .
Appy your mask merge layers


Give a drop shadow 2/2/50/5 to except closeup/s of tube.


Add your Artist © license and your name merge and save as png.

Thanks for stopping by, I hope you enjoyed it.

Love Whispers ♥


This tutorial was written and created by me on 26th February 2014
and for those with a working knowledge of PSP


Supplies needed 

Created by using PSP X5 - any resemblance to another is coincidental.

I am using the fantstic artwork of  Anna Marine  with a valid license
Please go Here to purchase tubes and license.

Scrapkit When You Love Someone created by Black Widow Creationz
You can find this beautiful kit Here.


Mask1 by HorsePlays Designs Heree.

Font used Vini 47 Duet

New transparent raster layer 700 x 700.

You can resize or crop later.

Open BWC_WhenyouLoveSomeone_Ele17 c/p resize 85 percent.Image FreeRotate 90 Left.
Delete any ribbon outside of frame using your selection tool.
Click inside frame with Magicwand-Selections-Modify-expand by 4.
New layer then c/p BWC_WhenyouLoveSomeone_PP4 into selection move below frame layer.
Open BWC_WhenyouLoveSomeone_Ele23 c/p above first frame then  add drop shadow.
Open your closeup tube c/p resize to fit frame add drop shadow.
Open BWC_WhenyouLoveSomeone_Ele24 c/p move to right of frames add drop shadow.
Open BWC_WhenyouLoveSomeone_Ele14 cp/ resize 80 percent move to top right of layer.
Open BWC_WhenyouLoveSomeone_Ele36 c/p Image FreeRotate 90 Right move to left of frame
 add drop shadow.
Open BWC_WhenyouLoveSomeone_Ele29 c/p move to bottom of frame add drop shadow.
Open BWC_WhenyouLoveSomeone_Ele44 c/p resize 65 percent twice move to right of layer.
Open BWC_WhenyouLoveSomeone_PP9 c/p onto background layer apply your mask merge.


Add your Artist © license and your name merge and save as Png.

Thanks for stopping by, I hope you enjoyed it.

Rose Petals ♥


This tutorial was written and created by me on 24th February 2014
and for those with a working knowledge of PSP

Supplies needed 

Created by using PSP X5 - any resemblance to another is coincidental.

I am using the fantastic artwork of © Caron Vinson with a valid license
Please go Here to purchase tubes and license.

Scrapkit Pearly Rose created by Dnscraps
You can find this beautiful kit Here. 

Font used Spahrty Girl


New transparent raster layer 700x 700   .

You can resize or crop later.

Open PearlyRosednscrapscapframeribbon c/p resize 80 percent.
click inside with Magic wand,selections Modify Expand by 4
add new layer below frame c/p into selection PearlyRosednscrapspaper 8 deselect, merge.
Open PearlyRosednscrapsglitterframe resize 75 percent move to left of layer.
Click inside with Magicwand, selections Modify Expand by 4, new layer
c/p into selection PearlyRosednscrapspaper4 deselect.
Adjust Blur Gausian blur-40 drag below frame.Merge frame and paper.
Open your tube c/p closeup into selection, deselect.Change blend mode to Lumancy(L).
Add your main tube move to right of layer add drop shadow.
Open PearlyRosednscrapsfan c/p below first frame layer, resize 75 percent add drop shadow.
Open PearlyRosednscrapsframeroses c/p duplicate see tag.
Open PearlyRosednscrapsdiamonds c/p resize 65 percent place between frames see tag.
Open PearlyRosednscrapsdecoratedhearts c/p resize50 percent move down next 
to tube add drop shadow.
Open PearlyRosednscrapscats c/p at bottom of  left frame
resize 65 percent twice add drop shadow. 
Open PearlyRosepetalbox c/p resize 45 percent move down bottom of frames add drop shadow.
Open PearlyRosednscrapsribbons c/p resize 85 percent move to left frame add drop shadow.
Open PearlyRosednscrapspins3 c/p resize 35 percent movt to top of ribbon. 
then using your selection tool remove the middle section by tapping Delete.

Open PearlyRosednscrapsstars c/p below tube layer then resize 75 percent.
Open PearlyRosednscrapssweetroses use your selection tool on first rose c/p as new layer.
Resize 38 percent then duplicate three times. Arrange around the petal box.


Add drop shadow to all.

Add your Artist © license and your name merge and save as png.

Thanks for stopping by, I hope you enjoyed it.

St Patty's Girls


This tutorial was written and created by me on 10th February 2014
and for those with a working knowledge of PSP


Supplies needed 

Created by using PSP X5 - any resemblance to another is coincidental.

I am using the fantastic artwork of  ©Keith Garvey with a valid license
Please go Here to purchase tubes and license.

I'm using PTU St Patty's Day created by Vickie's Scraps
You can find this beautiful kit Here.


Template_fall01 by Melissa from Misfits  Here


Mask of choice
Font of Choice or the one I used  Orion

Open template duplicate close original.
Delete the following layers.From Raster 5 layer and all the copied 5 layers Raster3
and  copy layer/s and raster 6 layer.


Starting from the bottom white layer up

On Grey Merged stripes select all Float Defloat.
C/p SPD_pp13_VS into selection, deselect.
Continue on I used the following:
SPD_pp1_VS on black Merged layer.
SPD_pp10_VS on Grey Merged layers.
Add a new layer above Raster 2 layer, - c/p into selection SPD_pp20_VS. 
Then add another new layer c/p SPD_pp2_VS then Image Flip then delete the original layer.
On the  black frame layer click inside right with Magic wand, new layer c/p your tube.
Repeat for the left frame side, deselect.Add drop shadow to tube layers.
Add your main tube above ele28 layer.

Elements used
SPD_ele7_VS c/p resize move to center of frame merged layer.
SPD_ele66_VS c/p resize center bottom frame.
SPD_ele28_VS resize move to bottom of frame.
SPD_ele5_VS c/p resize place on left of layer.
SPD_ele17_VS c/p resize move to bottom right of layer.
SPD_ele19_VS c/p resize move to bottom left of layer.
SPD_ele12_VS c/p resize move to center bottom of layer.
SPD_ele79_VS c/p resize paste above raster 4.
SPD_ele45_VS c/p resize paste above ele79 then using selection tool remove ends. Use your 
Eraser tool to tidy the ends.


 See tag for placement.
These are only a guide feel free to add others elements.
Give all your elements a drop shadow.
0/0/50/5.
SPD_ele23_VS c/p resize image mirror.
SPD_ele24_VS c/p  resize arrange both balloons then Merge down layers arrange.
Duplicate move both down above background layer.
I didnt add any drop shadow to these layers.
New layer c/p SPD_pp_VS apply your mask merge group.


Add your Artist © license and your name merge and save as png.

Thanks for stopping by, I hope you enjoyed it.

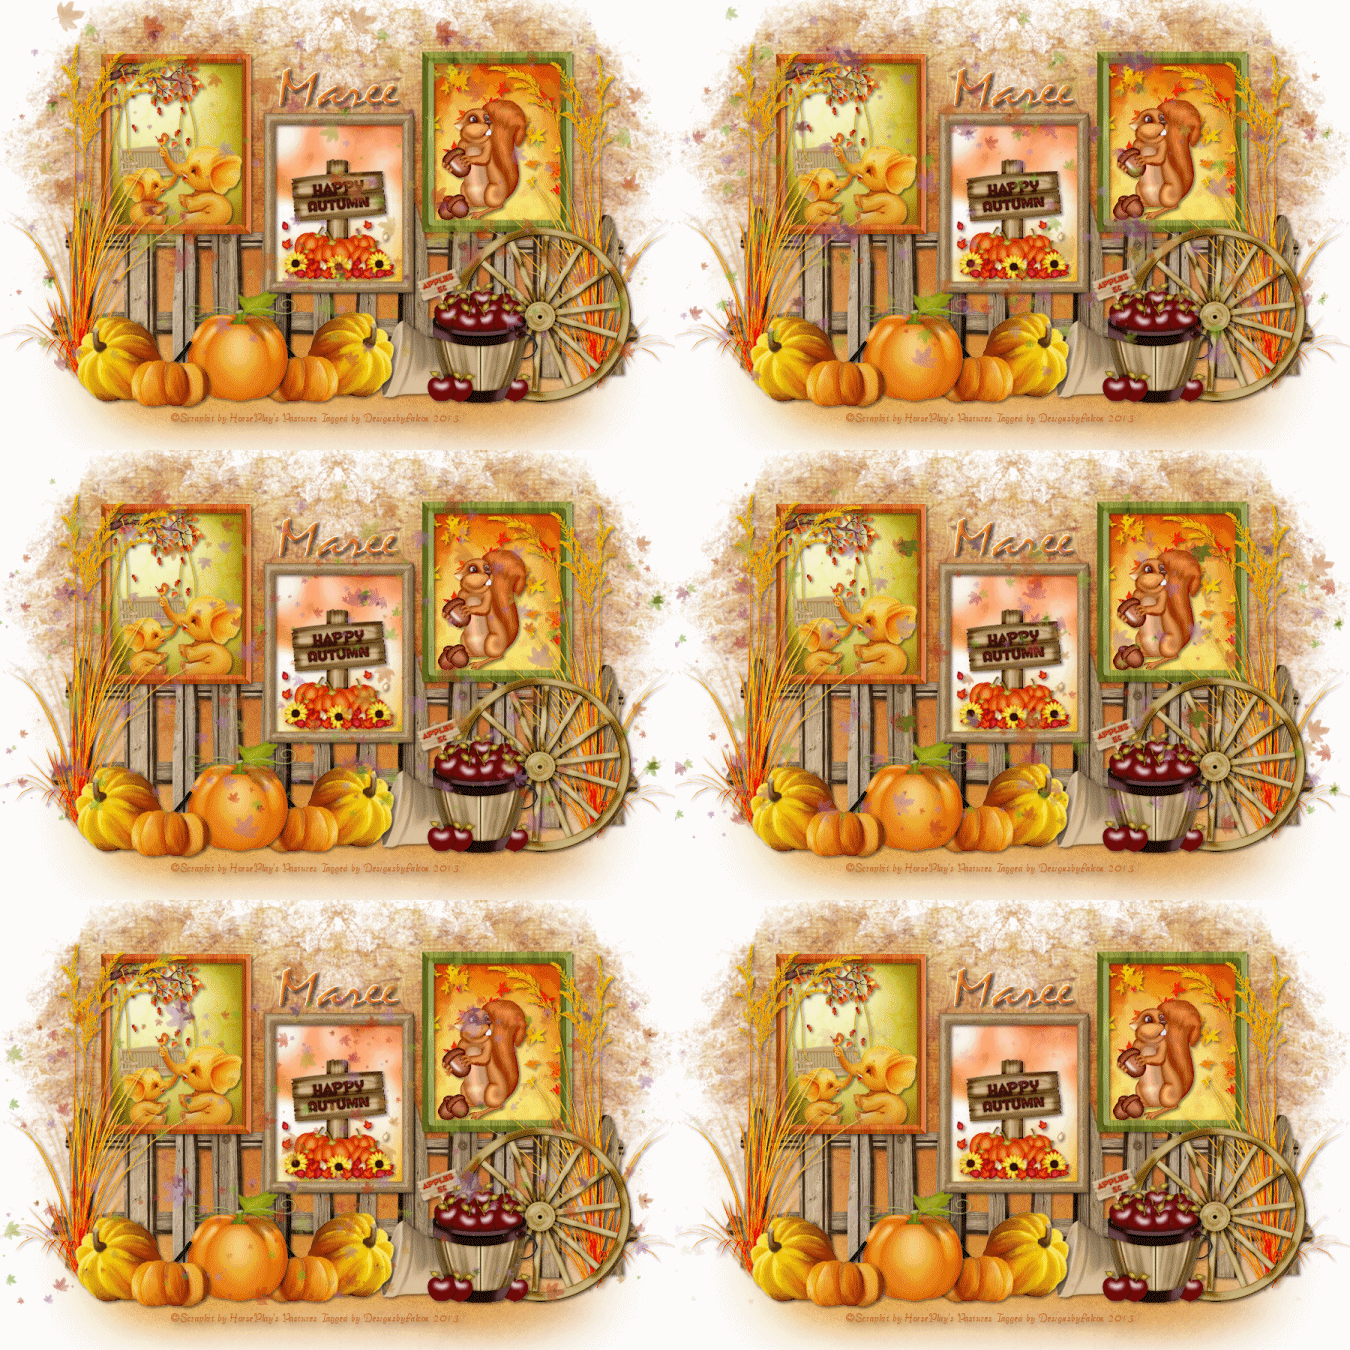
Colours of Autumn ♥


Written on    using PSP X5 - any resemblance to another is coincidental.
This was written for those with a working knowledge of PSP


Supplies needed

Autumn Sunset created by HorsePlays Pastures
You can find  this beautiful kit Here


Mask of Choice.

Font of choice

Animation Here

New transparent raster layer700 x 500.

You can resize or crop later.

Select frames hpd_ASEl28.30,31 c/p all resize 40 percent then align to your liking.

With Magic wand click inside first frame Selections Modify Expand by 5.
New layer open hpd_AS_P8 c/p into selection deselect drag below frame.
Repeat with frame 2 I used hpd_AS_P1 and for frame 3 I used phd_AS_P9.

I chose to use these elements in frame 1 hpd_AS_El & hpd_AS_El22.
Frame 2 hps_AS_El40 and frame 3 hpd_AS_El52, give all a drop shadow arrange to your liking.

Select hpd_AS_El20 c/p above background layer then resize 65%, duplicate align,then Merge down 

add a drop shadow.
Select hpd_AS_El80 c/p above fence layer resize 80% duplicate Image Mirror add drop shadow.
Select hpd_AS_El13 c/p resize 50% duplicate see tag for placement add drop shadow.
Select hpd_AS_El14 c/p resize 75% place between the other pumkins add drop shadow.
Select hpd_AS_El21 c/p resize 45% arrange next to pumkin in center then add drop shadow.
Select hpd_AS_El49 c/p resize 75% drag to right of layer add drop shadow.
Select hpd_AS_El37 c/p resize 80% move to left of wheel add drop shadow.
On background layer select all c/p hpd_AS_El78 into selection deselect apply your mask 

Add your Artist © license and your name merge.

Animation.
Open animation shop select your animation check how many frames in animation then minimise.
In PSP copy merged paste as new animation.Using Ctr+L to add the required frames.
Select animation select all copy then paste on merge copy near top or where you would like to 

place it.
Check your animation then save. 

Thanks for stopping by, I hope you enjoyed it.


An Antique Autumn


This tutorial was written and created by me on 9th January 2014
For those with a working knowledge of PSP


Supplies needed 

Created by using PSP X5 - any resemblance to another is coincidental.

I am using the fantastic artwork of ©Alena Lazareva with a valid license
Please go to UYA to purchase tube/s and license.

Scrapkit is Antique Autumn created by Tasha's Playground
You can purchase this beautiful kit Here
Mask of choice
Font of choice

New transparent raster layer 700 x 700.
You can resize or crop later.
Add drop shadow to all as you go.


Change your foreground color to #ca8502 flood fill background layer then apply 
Alien skin Splat-Edges.


Wheel 80% Flip Horizontal move to left
Branch3 76% move to left
Frame4 80% selections modify-expand by 6 -new layer
c/p Image AL0001Autumn  then deselect-merge down
C/P main tube
Leaf scatter 65%
Books 65%
Candle 80%
Leaves 85%
Please add any other elements you wish too.

Add your name and tube © and save as png.

Thanks for stopping by,this is only a guide feel free to add more elements.
I hope you enjoyed it. Would love to see your creations.


Ice Fantasy ♥


This tutorial was written and created by me on 9th January 2014.

Supplies needed 

Created in PSP X6 - any resemblance to another is coincidental.

I am using the fantstic artwork of ©Susan Justice with a valid license
at UYA to purchase tube/s and license.

Scrapkit  Iced Fantasy created by Tasha's Playground. 
You can purchase this beautiful kit Here.
Mask used Urban Fairy mask42.
Font of choice

New transparent raster layer 650 x 650.
Add your drop shadow to all as you go.

Select all on background layer open paper 6 c/p into selection then deselect.
New layer select all c/p paper into selection, deselect apply ufmask42 merge group.
Apply this drop shadow 4/4/60/15 only to mask layer.
Open frame 3 click inside with magic wand c/p Image SU0084Snowbird 
paste into selection,deselect.

Lights3 86%
Holly 70% duplicate place above wreath
Wreath 60%
Ribbon2 70%
Latern 60%
Flower2 90%
Chest 90%
Tube 86%

Add your name and tube © and save as png.

Thanks for stopping by this is only a guide, I hope you enjoyed it.
Would love to see your results.